
This article will create a simple LED flashing application and connect the LED to the Windows10 IoT Core device 410c.
This is a headed case. If you need to delve into what is headed mode and how to configure the device to be head, please refer to the instructions here:
In addition, the GPIO API cannot be used on your computer, please be sure to run the program on your 410c.
Import the project into Visual StudioYou can download the zip file from the link here and get the blinky file in the sample-develop directory. The case code can be developed using C++ or C#, and the reference documentation only contains C# cases.
First we can copy the folder from the project to Visual Studio.
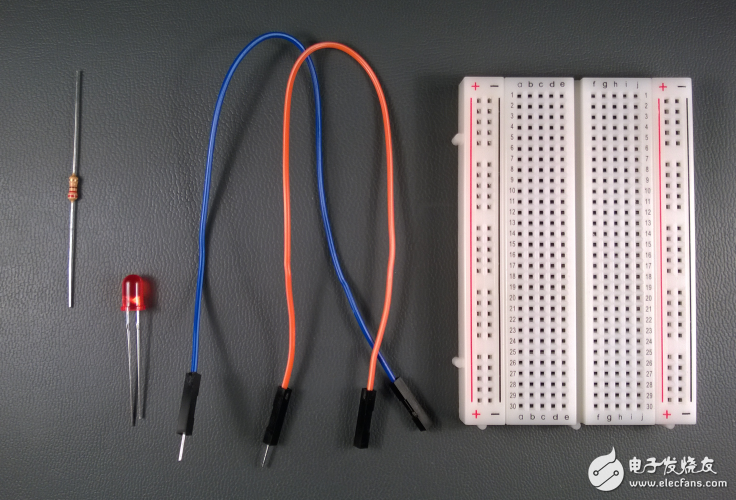
Connect LED to 410cWe need the following components
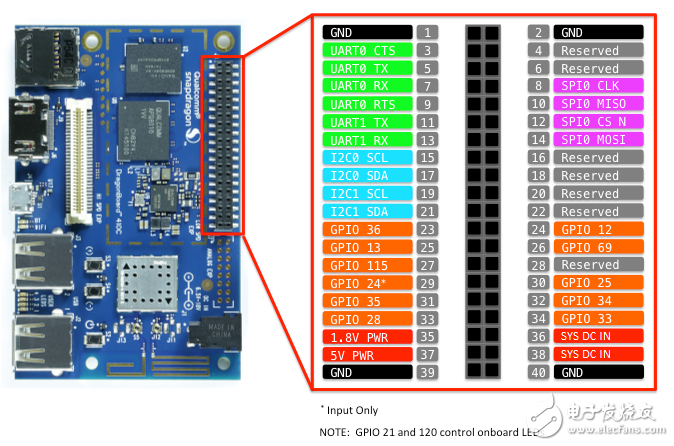
For reference, the low speed expansion connector on the 410c is as follows
Use the following steps to build the LED circuit we need:
A. Connect the short leg of the LED to the GPIO12 port (24pin on the expansion port).
B. Connect the long legs of the LED to the resistor (the polarity of the LED is very important, please be sure to distinguish)
C. Connect the other end of the resistor to the 1.8v (32pin of the expansion port)
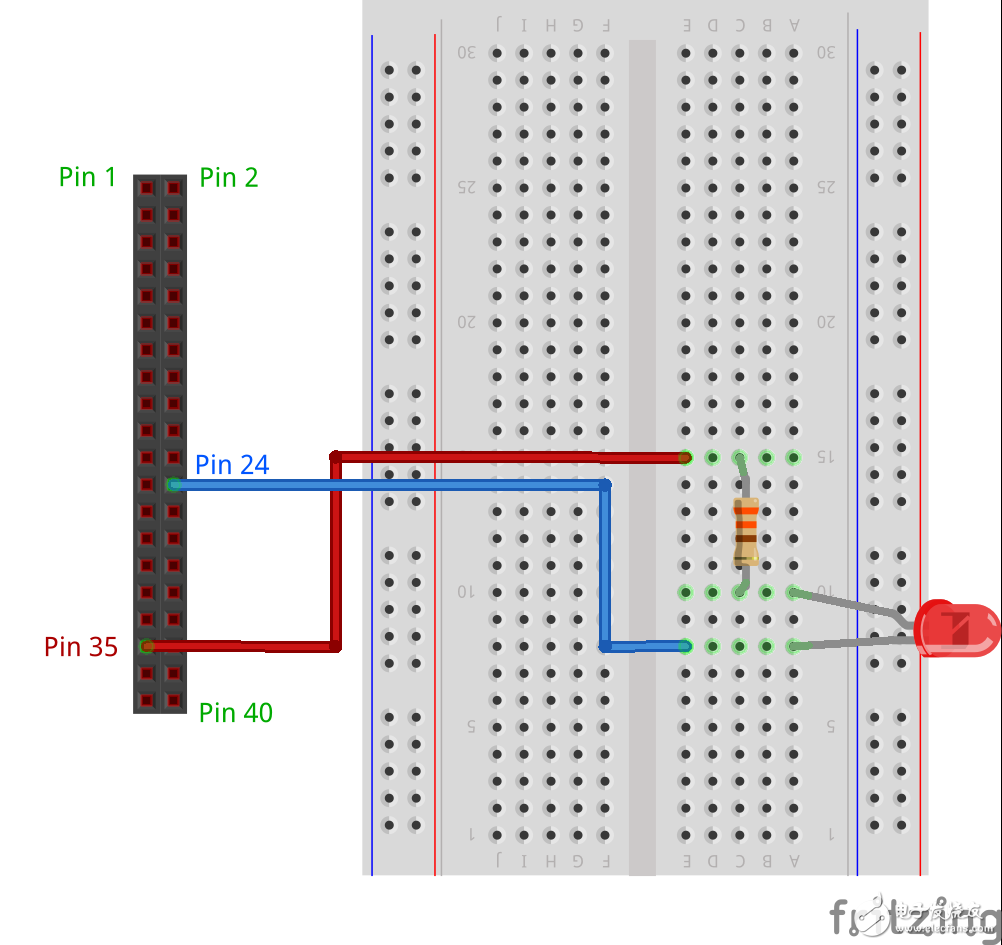
The following figure illustrates the connection on the breadboard:
Finally, the MainPage.xaml.cs file for LED_PIN will need to be modified as follows:
Private const int LED_PIN = 12;
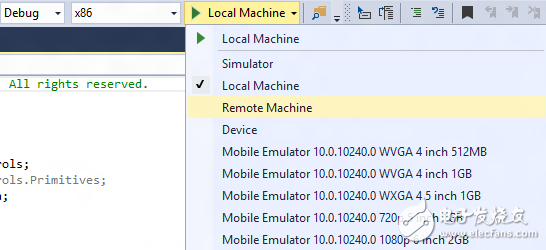
Start deploying your app1. By opening the app in Visual Studio, we can select the schema in the toolbar drop-down button. If you are using 410c then please choose ARM architecture.
2. Next, in the Visual Studio Tools manual, click the Local Machine drop-down bar and select Remote Machine.
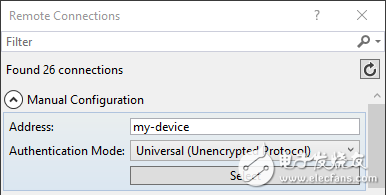
3. Next, Visual Studio will display the remote connection dialog. If you have used PowerShell to set a special identifier for the device, you can set it in the dialog box. In this case, we set the name to my-device. By default, the IP address of 410c can be used for representation. After entering the device's name or IP address, select None in the Windows AuthenTIcaTIon column and click Select.
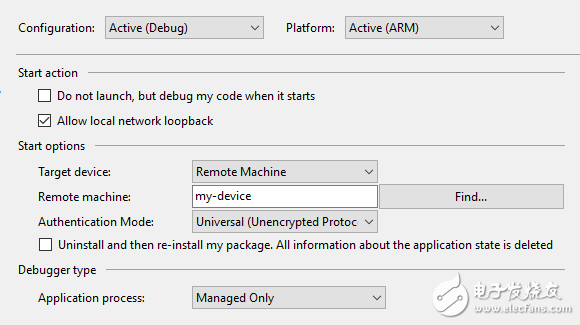
4. Next we can verify or modify the parameters by setting the project properties (select properties in the Solution Explorer) and selecting Debug.
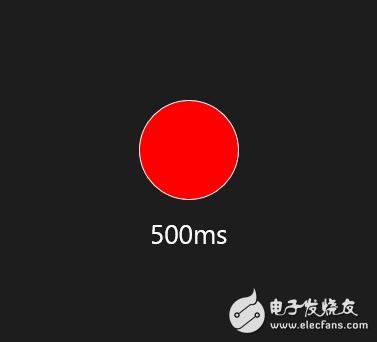
5. When we have set it as above, press the F5 key. If there are some installation packages you have not installed, Visual Studio will automatically download and set them up, please wait a moment. Next, your application will be quickly deployed on the 410c, and you can see the synchronized simulation image of the LED on the PC screen.
Congratulations, you have successfully controlled the hardware on the 410c and deployed the application.
Automotive Switches
Automotive Switches
Automotive Switches,ie, Car Switches are gradually enjoy a lager popularity in the Automobile industry , including Automotive Push Button Switches, Automotive Toggle Switches, Automotive Rocker Switches, Automotive Rotary Switches , Automotive Battery Switches.

Our Car Electrical Switches could equip with LED light or without light, which is according to our customer`s requirement. Meanwhile, our Automotive Push Button Switches could reach IP 67 waterproof rating. We have different shape of Automotive Electrical Switches for you to choose, comprising Square and Round.
Our Automotive Switches is normally used to turn on the car, and it is normally use the High Current to conduct the engine.

Automotive Switches,Custom Automotive Switches,Automotive Electrical Switches,Automotive Accessory Switches
YESWITCH ELECTRONICS CO., LTD. , https://www.yeswitches.com