
I. Introduction
Raspberry PI Raspberry Pi is an advanced embedded Linux motherboard with advanced functions. It can realize complete computer functions. In recent years, because of the cheap and convenient use of Raspberry Pi, the Raspberry Pi is very hot and has been popular among many developers. Love. In addition, Arduino is a convenient, flexible and easy-to-use embedded development tool that can perform real-time signal acquisition and control. It is also very well developed and popularized in recent years because of its ease of use and development.
2. Positioning
The Raspberry Pi is a complete computer with strong processing power. Although there are IO ports that can extend external applications, there are still some shortcomings. It is not convenient to extend the surrounding hardware. Although Arduino does not have powerful processing capabilities, it has Very powerful expansion capability, from here, the Raspberry Pi function and the Arduino function complement each other, so DFROBOT has launched such a Raspberry Pi expansion board with Arduino Leonardo, then we will introduce this Raspberry pie extension board
Three. Unpacking
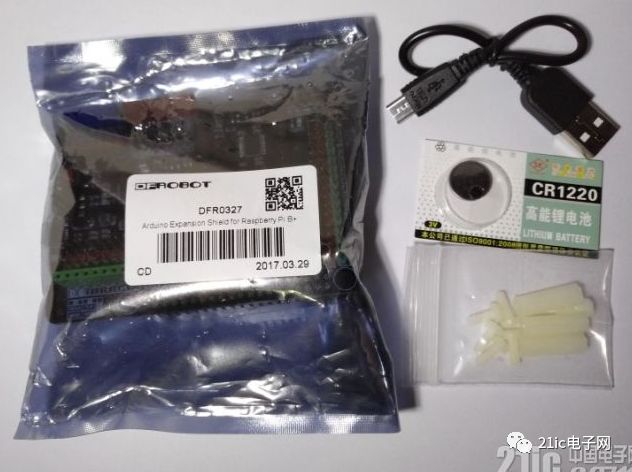
The Arduino Raspberry Pi expansion board is wrapped in an anti-static bag and is equipped with a MicroUSB cable, a CR1220 button battery and three plastic screws and studs, as shown below:
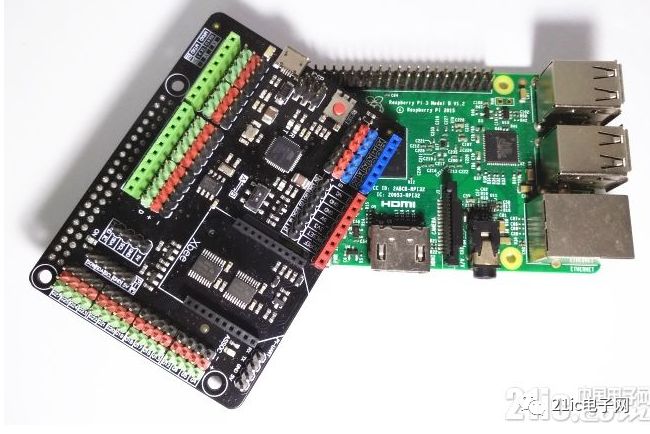
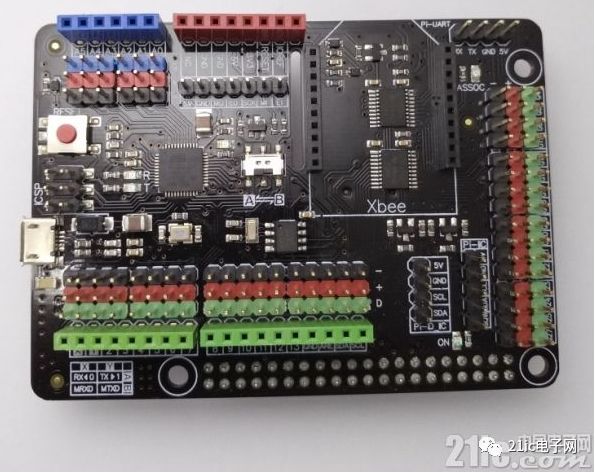
After opening the anti-static bag, you can see this Arduino Raspberry Pi expansion board, as shown below:
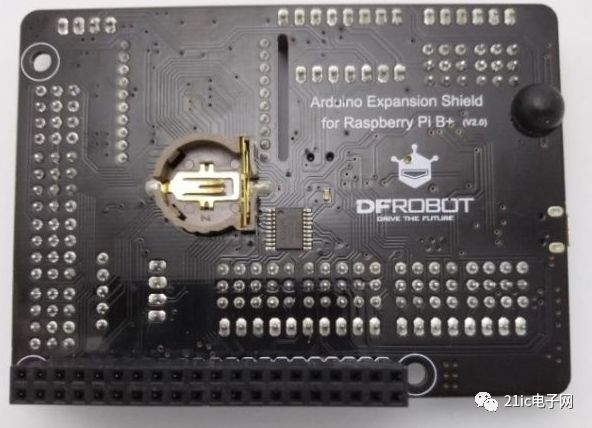
The back of the board, as shown below:
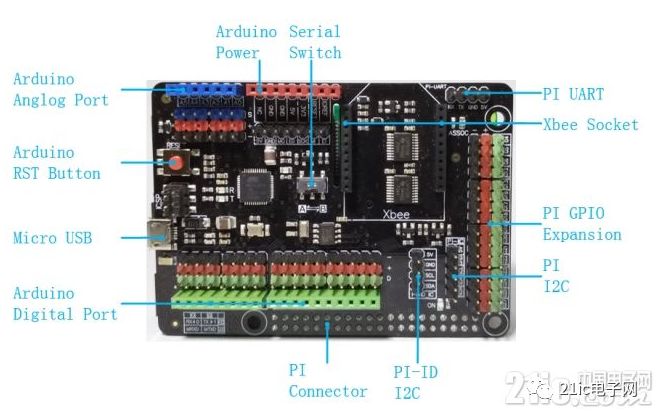
The Raspberry Pi expansion board uses a black solder mask layer, the pins and rows are colored, the devices are arranged neatly, and the overall visual effect is very good.
Product function
This development board combines the Arduino's Leonardo with the Raspberry PI interface, and adds other features to form the expansion board.
The expansion board functions are as follows:
(1) Microcontroller: Atmega32u4
(2) Boot loader: Arduino Leonardo
(3) Working voltage: 5V
(4) Digital I/O port: 20
(5) Analog I/O port: 6
(6) Xbee expansion interface: 1
(7) Raspberry Pi leads GPIO: 16
(8) Raspberry Pi leads to the I2C bus: 1
(9) Raspberry Pi leads ID_I2C bus: 1
(10) Raspberry Pi leads SPI bus: 1
(11) Raspberry Pi leads TTL UART serial port: 1
(12) Integrated RTC clock, Raspberry Pi can be read directly
(13) Serial port switching function
The expansion board function interface is shown as follows:
V. Product design
The expansion board has a rounded rectangle design, and the expansion board has the same length and a slightly wider width than the Raspberry Pi.
The board design has three positioning controls with the same positioning position as the Raspberry Pi, as shown below:

The Raspberry Pi expansion board uses different color pins and rows of seats to distinguish the different functions of the pin and the row.
Analog I/O row seat is blue
The pin header and the row seat of the power supply are red
Digital I/O pin headers and row seats are green
The solder mask is black, and the device layout of the entire board is neat.
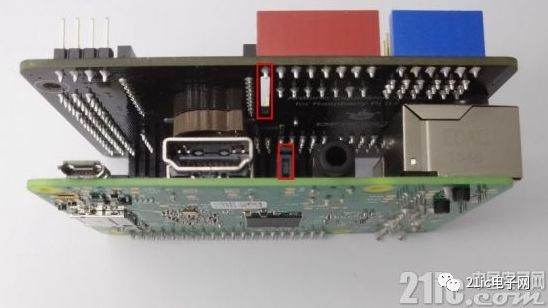
Below the reset button, there is a rubber pad on the back of the board, which is placed on the RJ45 connector. The design is to support the board on the one hand, and to prevent the pins of the RJ45 interface from shorting the pins on the other hand, as shown below:

There is a hollowed out slot next to the board Xbee interface. The guess is that when using the Raspberry Pi Camera, it is used to pass through the FPC, so it will not affect the peripherals of the Raspberry PI, as shown below:
All IOs of the Raspberry PI are pulled out by the level-shifting chip, and the user can pull up to 5V or 3.3V according to the level requirement of the peripheral, and has the function of port protection.
The DIP switch is designed on the development board to select the serial port inserted in the Arduino Shield slot. The Shield is connected through the Raspberry Pi serial port or through the Arduino Leonardo. When dialing to the A terminal, connect to the serial port of the Raspberry Pi. When dialing to the B terminal, connect to the Arduino's own serial port.
The details of the board are handled in full, whether it is the hardware solution or the board workmanship is very good, in general, the design of the board is very careful.
Product use plan
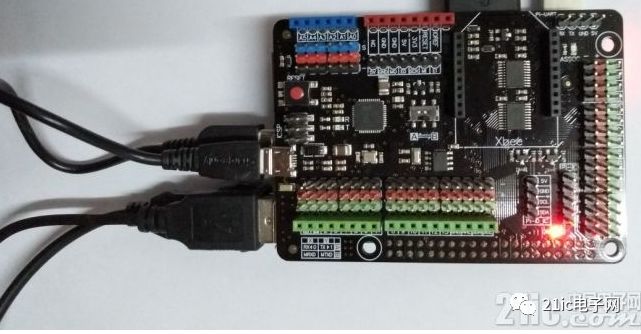
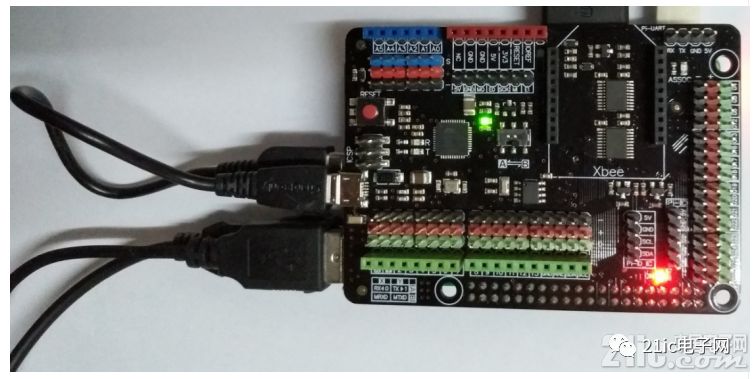
Next, we will start using this development board, connect the Arduino Raspberry Pi expansion board to the Raspberry Pi, and connect the expansion board to the Raspberry Pi using the included USB cable.
Power the Raspberry Pi, connect the monitor, mouse and keyboard, as shown below:
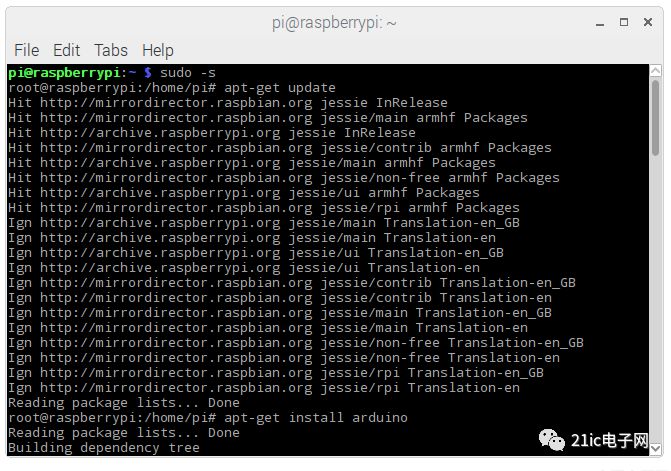
Next we will install the Arduino IDE on the Raspberry Pi.
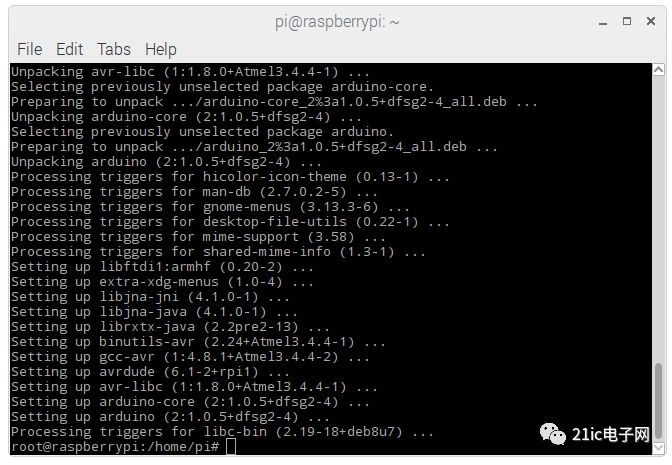
Obtain the ROOT permission and install the Arduino after installing the update, as shown below:
The installation is complete, as shown below:
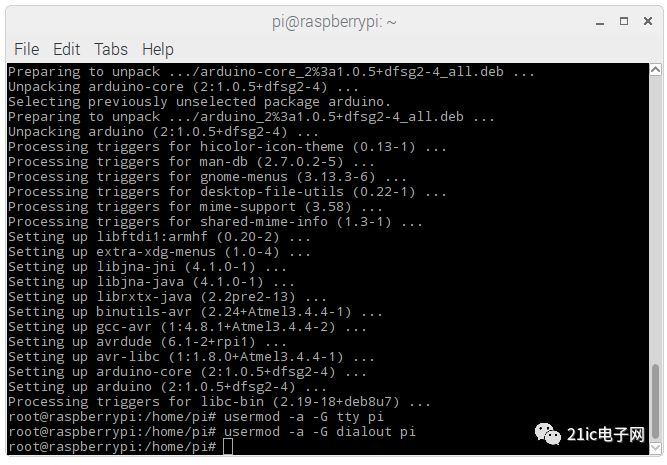
Because we want to operate the serial port, we will add the PI user to the tty and dialout, as shown below:
Next we have to open the Arduino IDE, as shown below:

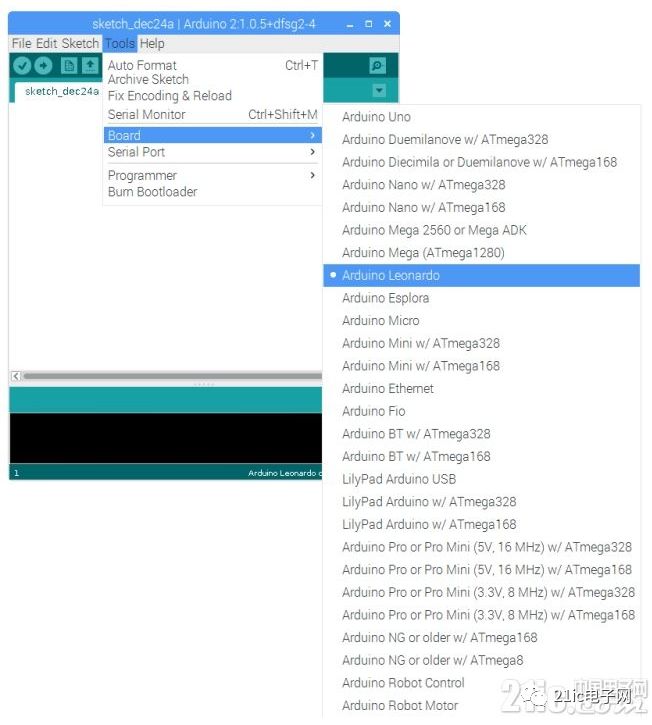
After opening the Arduino IDE, select Arduino Leonardo under the board, as shown below:
The Serial Port has been set to ACM0, as shown below:

Next open the program and light the 13-pin LED as shown below:

Download the program to the expansion board, the green LED on the board lights up, as shown below:
We can also use the Firmata protocol to communicate with Raspberry PI and Arduino, and more operations. Due to space reasons, we will not do the demonstration here. The playability of Raspberry PI and Arduino is still very high. Interested in Students can try.
From the above operation, it is relatively easy to do Arduino development on Raspberry PI. It is not much different from development on Windows, and this expansion board has a lot of optimization design to perfectly combine Raspberry PI and Arduino. Is a good tool for implementing innovative projects.
VII. Other information
The official provides the schematic, component location map, board interface detailed description and other information, in addition, the official also provides Raspberry PI and Arduino tutorial, the tutorial is more detailed, suitable for beginners to learn, is a good way to learn Arduino and Raspberry PI.
Summary and outlook
Raspberry PI and Arduino are the two hottest representatives of open source hardware. Each has its own advantages and disadvantages. It seems that combining the two can make up for their respective shortcomings, and the use of the two is relatively easy. DFROBOT The expansion board solves the hardware connection and provides a way to use the software, making it a relatively easy way to use both Raspberry PI enthusiasts and Arduino enthusiasts. In general, this is an expansion board that is very suitable for relatively complex projects. Raspberry PI does a lot of data processing and network connection work. Real-time data acquisition and control with Arduino is also a strong combination. The solution is suitable for most of the makers, and can solve most of the ideas of the makers. The product design, ease of use and quality of DFROBOT products are guaranteed, and hope that the makers can make more fun. More interesting works.
HQD Vape pen, Wholesale HQD Vape, HQD Manufacture
Shenzhen Xcool Vapor Technology Co.,Ltd , http://www.xcoolvapor.com